If you are using Ubuntu on a virtual machine created with Oracle VirtualBox, one of the very first things you would want to do right after installing the OS is to install the VirtualBox Guest Additions.
“Guest Additions” provides features that will help with improving the guest operating system as well as with the guest interacting with the host operating system.
Some of the features VirtualBox Guest Additions provides are:
- Mouse pointer integration
- Shared folders
- Better video support
- Seamless windows
- Generic host/guest communication channels
- Time synchronization
- Shared clipboard
- Automated logons
You can find more detailed information at Guest Additions Introduction.
In the example created I am running Ubuntu Desktop 18.04 LTS on a Microsoft Windows 10 Host with VirtualBox version 5.2.12. So lets get started…
First… Grab the Latest VirtualBox
I cannot stress how important this step is so before you begin make sure you visit the VirtualBox Download page and install the latest application version for your host.
Installing VirtualBox Guest Additions on Ubuntu Desktop 18.04
Once the Ubuntu installation is complete, open a terminal window and run the command below to install the Linux headers for your kernel, build-essential and DKMS (Dynamic Kernel Module Support) .
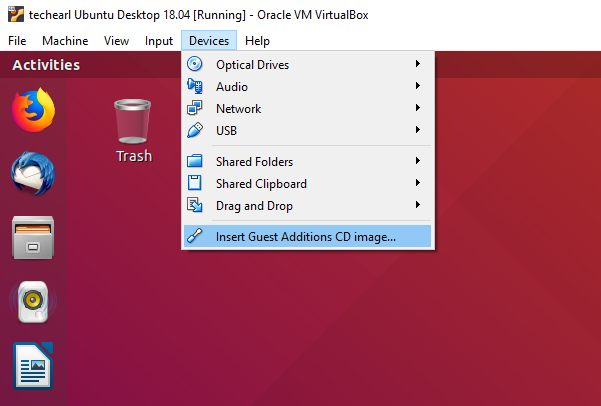
sudo apt install linux-headers-$(uname -r) build-essential dkmsOnce you have installed the above requirements, the Devices menu in your virtual machine and select “Insert Guest Additions CD Image…” as shown in the image below.

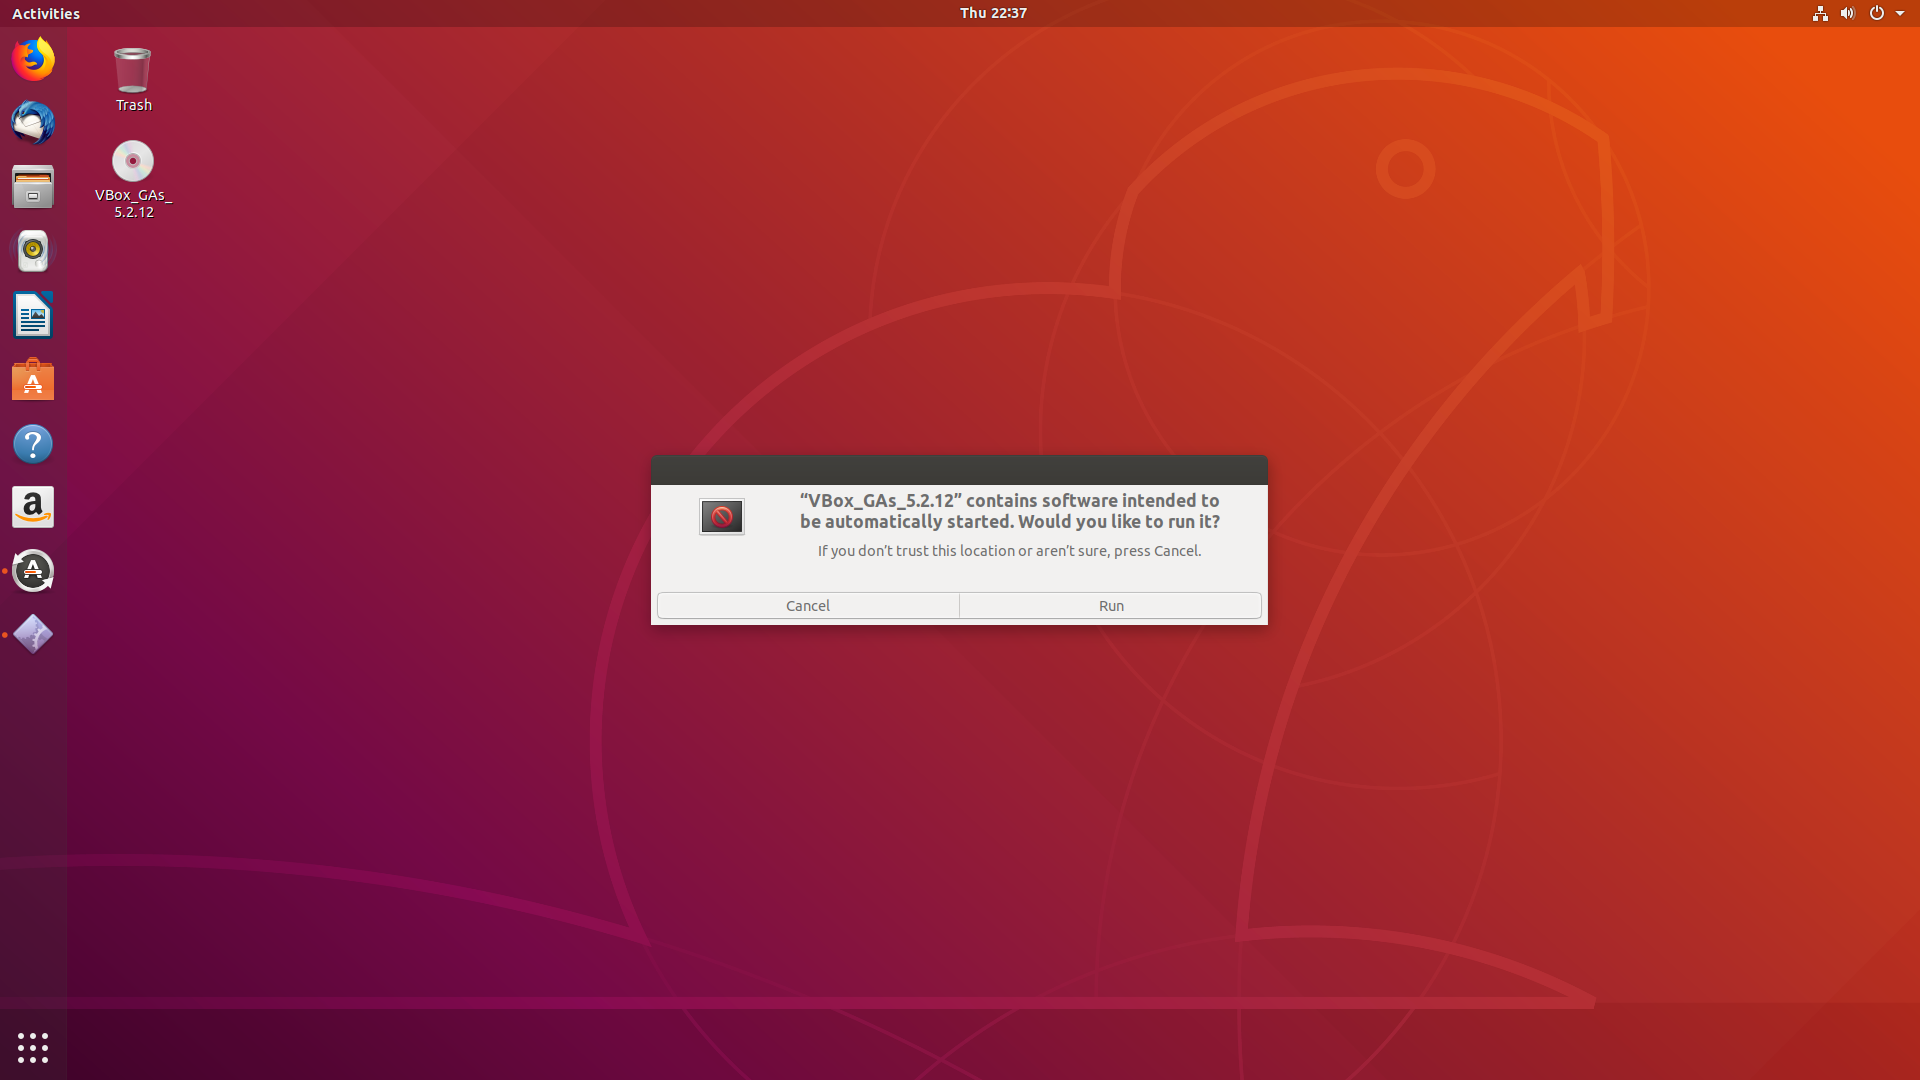
This should mount the guest additions automatically and you should see the mounted drive (VBOX_GAs_x.x.x) show up on your desktop similar to the image below. You may also be presented with the option to run the CD, click Run to execute the installation script.
If you had not run the command mentioned previously to install the required packages as mentioned above, the result window will look similar to the image below and also have the following warning. If that is the case install the requirements using the command from above and run the software on the CD again.
Verifying archive integrity... All good.
Uncompressing VirtualBox 5.2.12 Guest Additions for Linux........
VirtualBox Guest Additions installer
Copying additional installer modules ...
Installing additional modules ...
VirtualBox Guest Additions: Building the VirtualBox Guest Additions kernel modules.
This system is currently not set up to build kernel modules.
Please install the gcc make perl packages from your distribution.
VirtualBox Guest Additions: Running kernel modules will not be replaced until the system is restarted
VirtualBox Guest Additions: Starting.
Press Return to close this window...
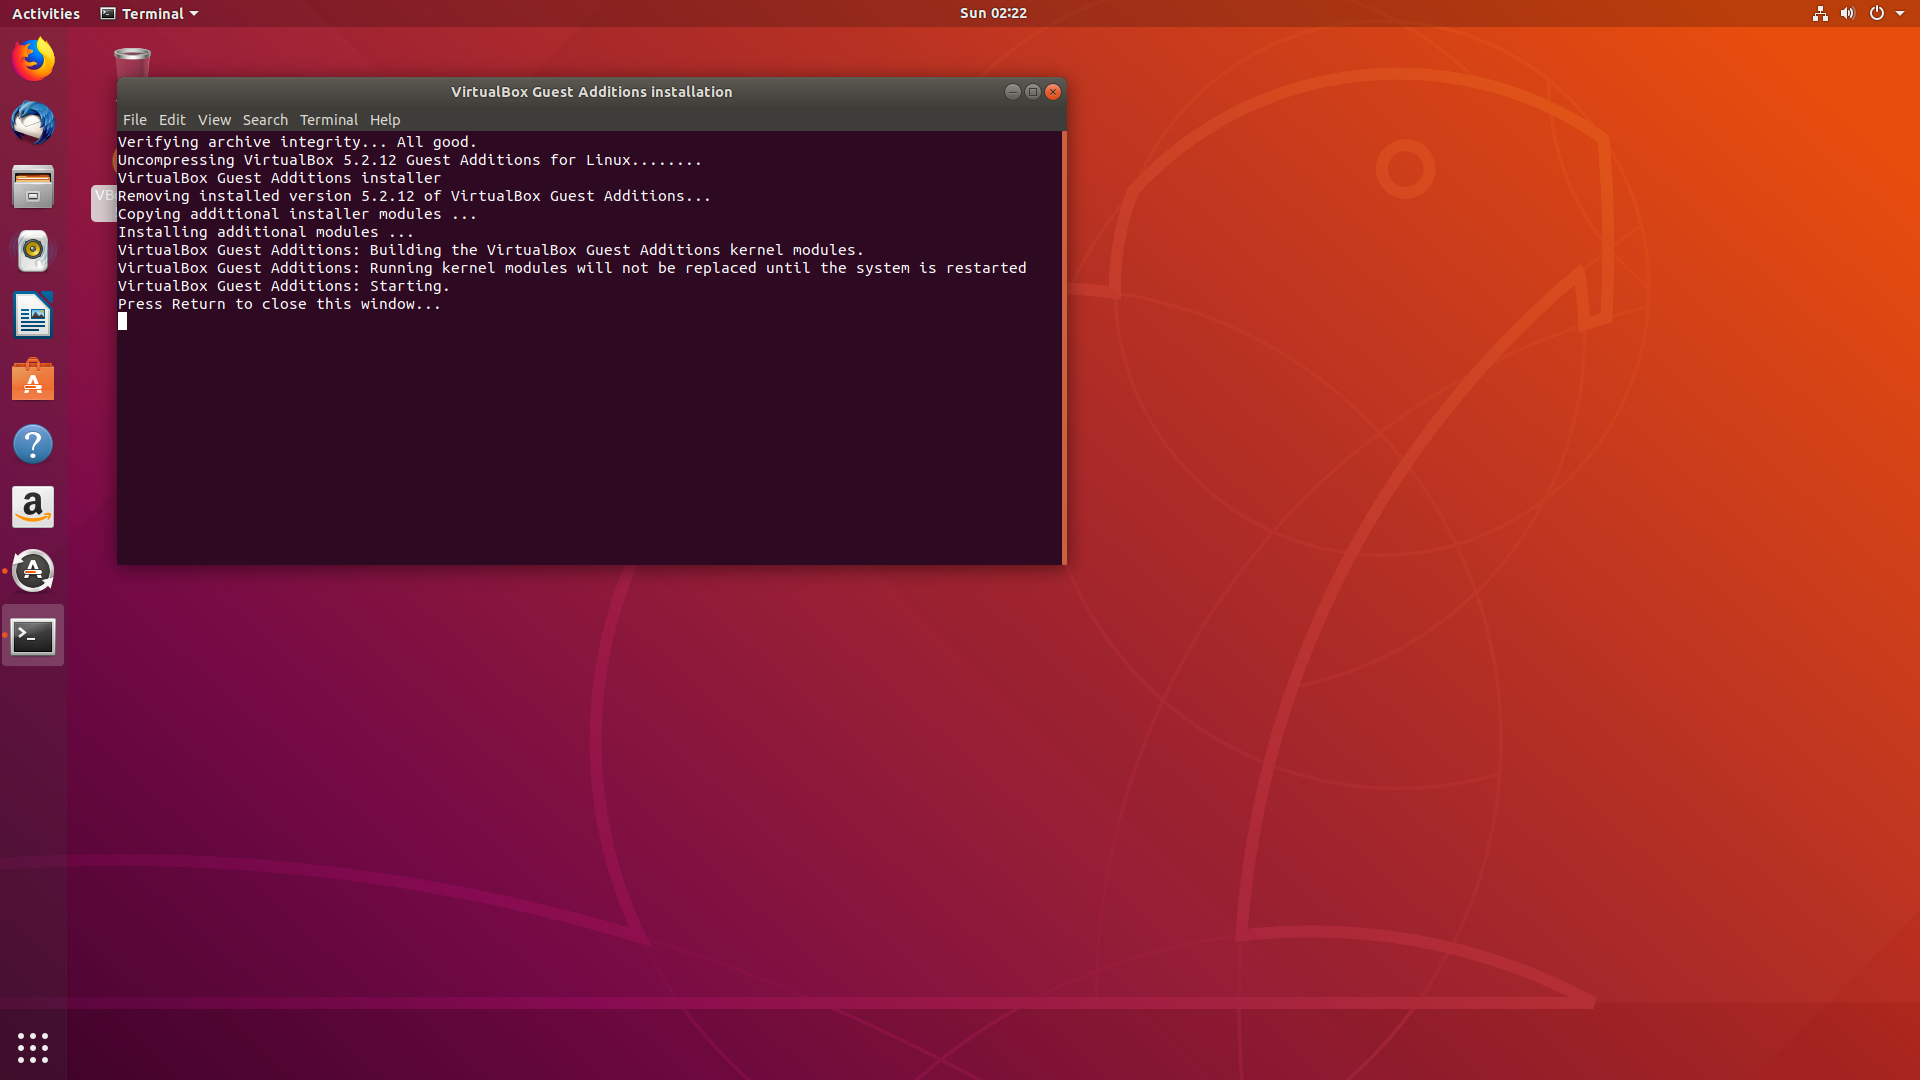
If everything worked out and the installation was successful the resulting screen should look similar to the one below.
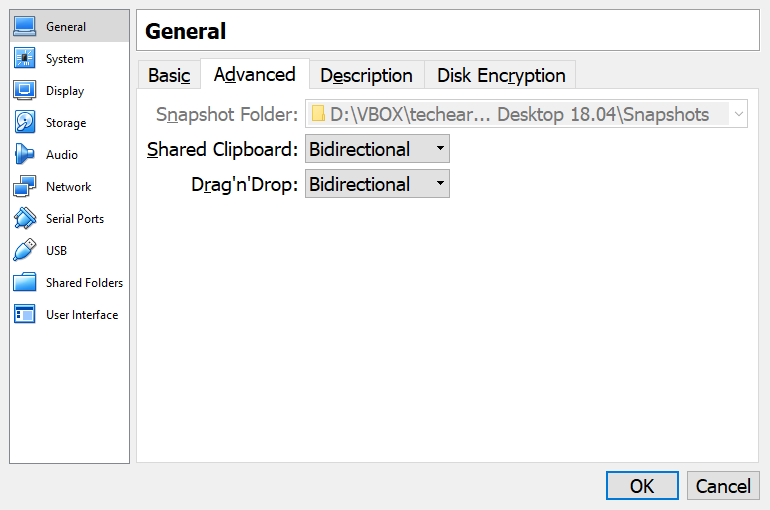
At this point you can check your Shared Clipboard and Drag’n’Drop settings by going the VM settings, General -> Advanced and set it to your preference, I have both set to Bidirectional as shown in the example below.
Press ok to save and reboot the virtual machine. Once the machine has come back up, you can perform a simple test by opening the text editor and pasting some text copied from the host machine.
You should now be able to experience the ubuntu guest in a more pleasing manner.


